Make an Aspect Ratio Grid
Occasionally, we need to be able to preserve the aspect ratio of objects within our designs. Whether you’re designing a grid of videos or laying out headshots for a bracket for this season of The Bachelor, GuideGuide can help you out.
This guide dives into grid notation, a powerful but a bit complicated language for “writing” guides. If you find this all confusing, don’t worry, it is…
Understanding the problem
Our goal is to create a grid of tiles to hold videos that each have a 16:9 ratio. The grid should be three columns, have 40 pixels of space between each video, and have as many rows as will fit in the given space.
The Grid form treats the horizontal and vertical axes as independent things. This means that relative commands like percentages or ~ wildcards will be relative to their axis. It won’t work for this.
Calculating aspect ratios requires details about both axes, so we need to switch to the Custom tab. This lets us use grid notation to “write” grids. Grid notation can cross reference other grids, so we can do the math we need to figure out aspect ratios.
I know, sorry, there’s math involved.
Create our grid
-
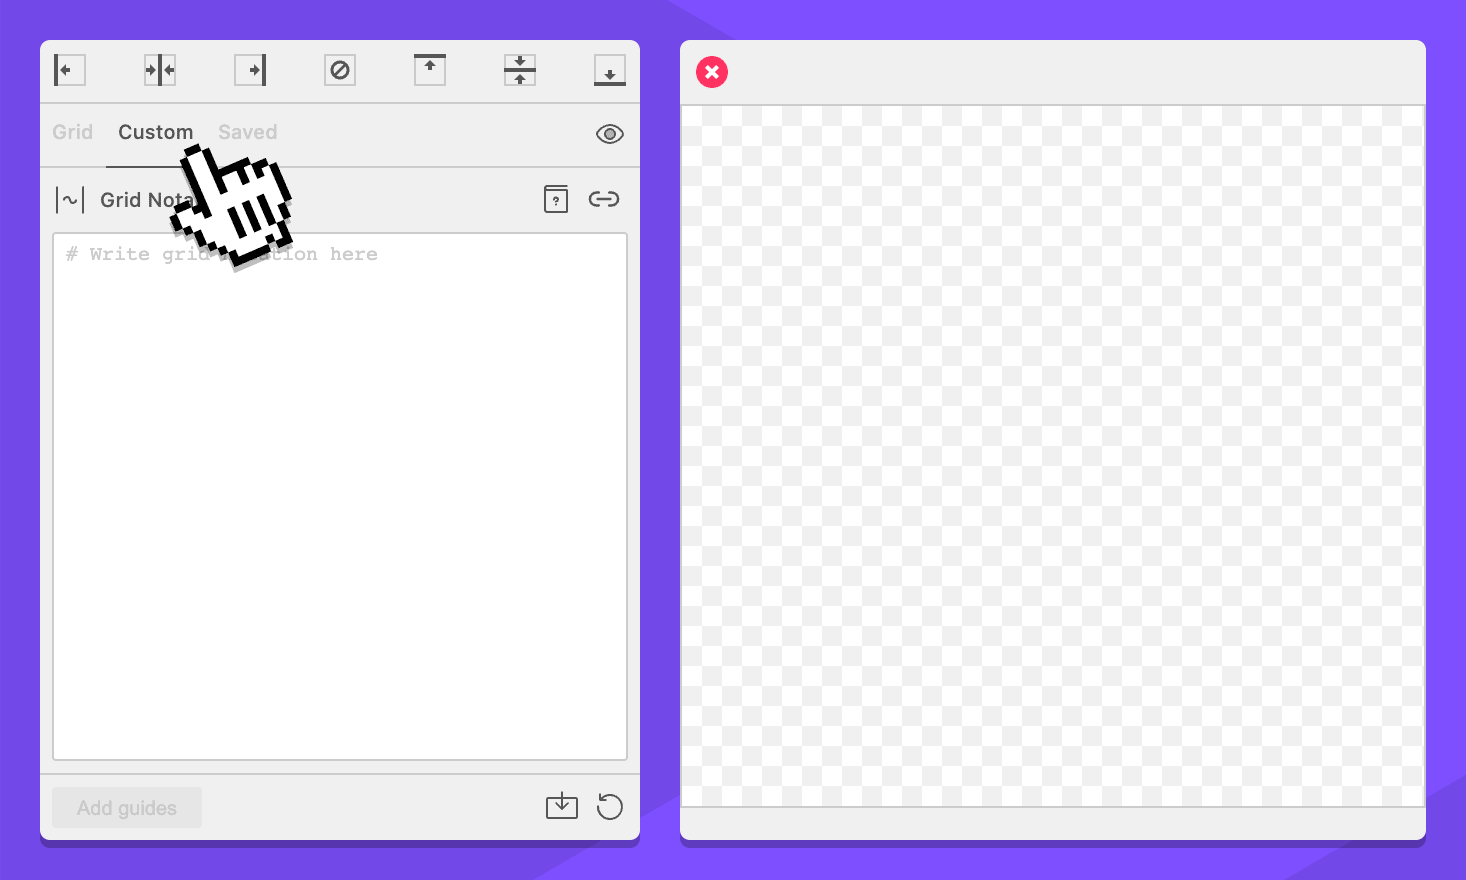
Navigate to the Custom tab.
-
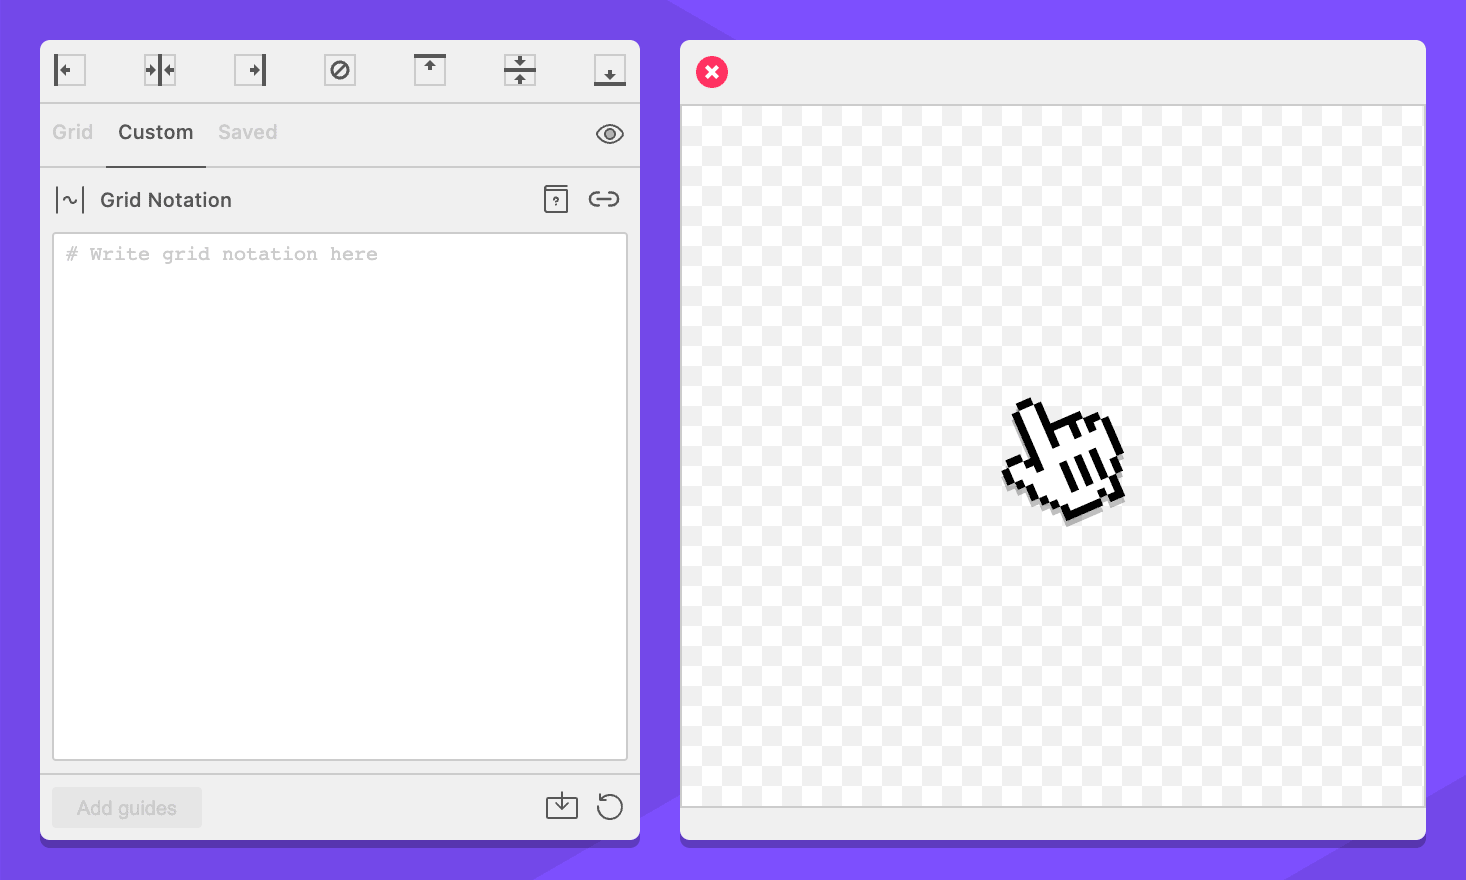
Select your document, page, artboard, or an object. This will work anywhere.
-
Enter this in the Grid Notation field:
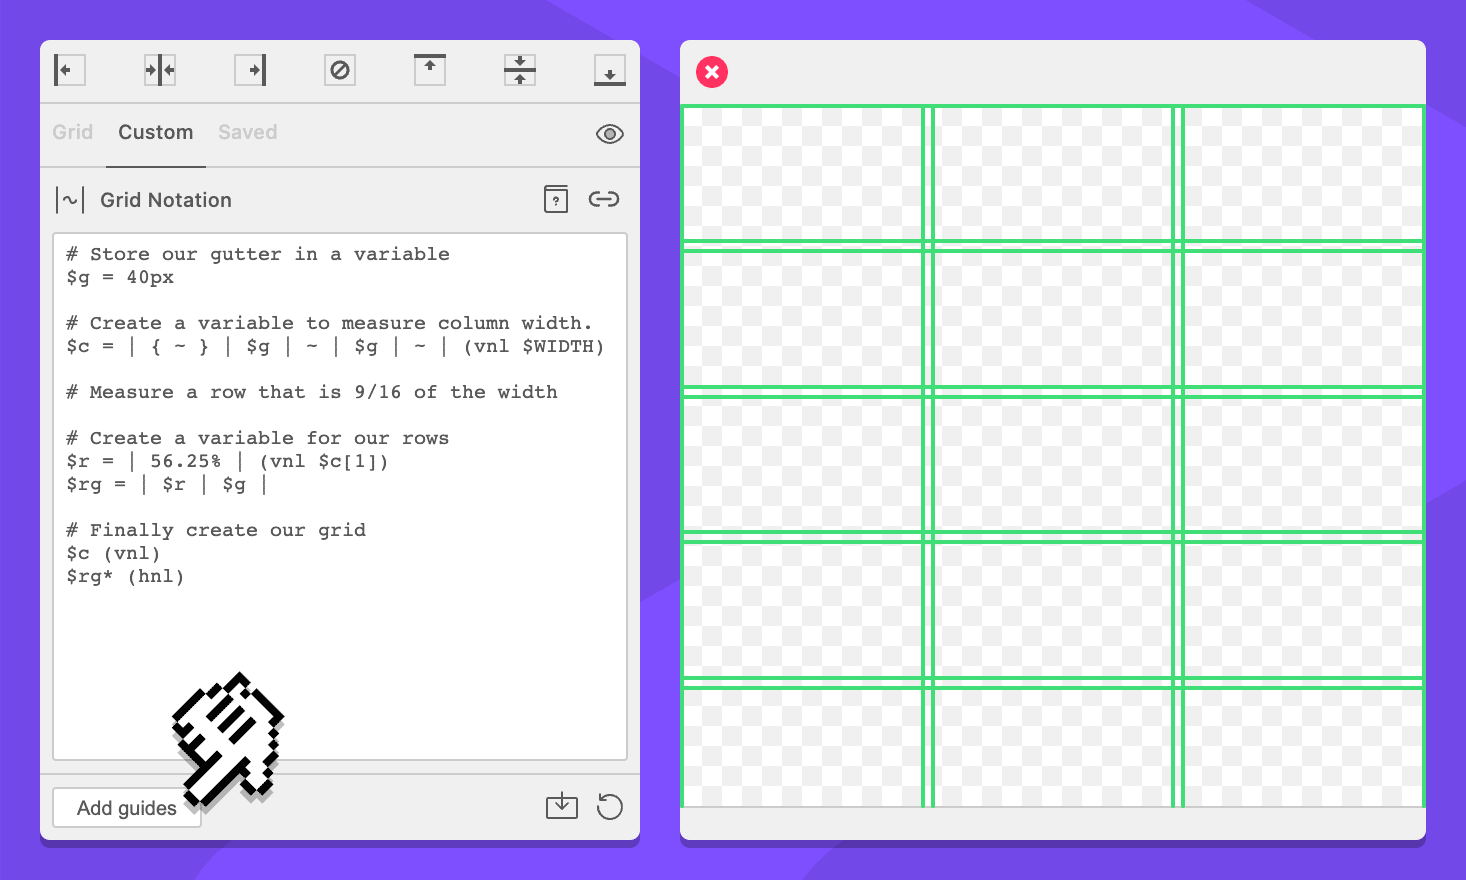
# Store our gutter in a variable
$g = 40px

# Create a variable to measure column width.
$c = | { ~ } | $g | ~ | $g | ~ | (vnl $WIDTH)

# Measure a row that is 9/16 of the width
$r = | 56.25% | (vnl $c[1])

# Create a variable for our rows
$rg = | $r | $g |

# Finally create our grid
$c (vnl)
$rg* (hnl)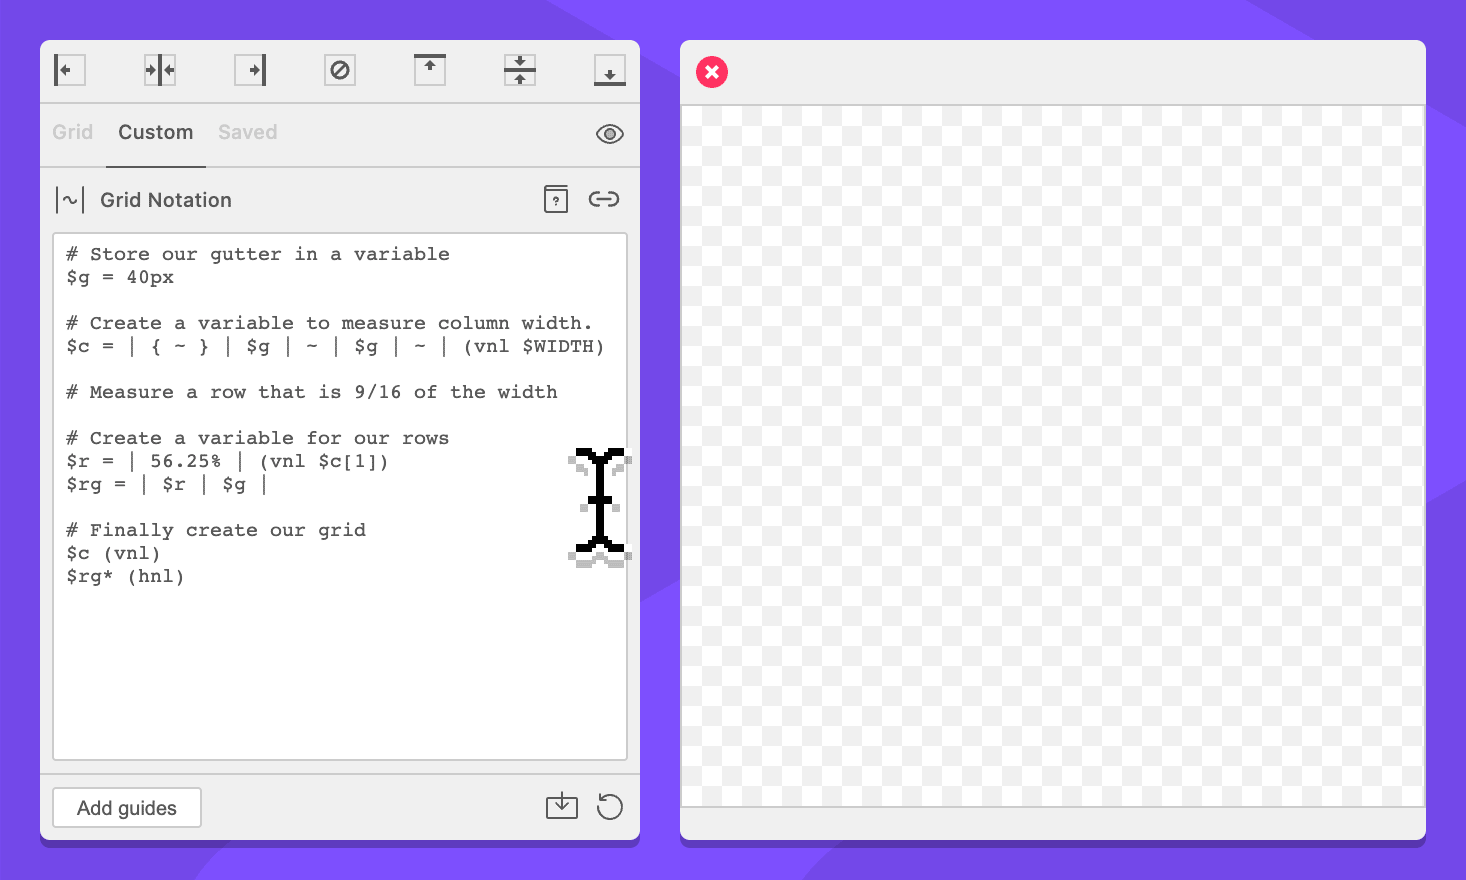
-
Click the Add guides button.
How it works
That’s a lot, I know. Let’s break down what’s going on.
# Store our gutter in a variable
$g = 40px
First, we create a variable that contains one command that is the size of our gutter. Variables don’t do anything by themselves, they just hold information for us so we can refer to it later.
This step isn’t completely necessary, we could use 40px everywhere. However it makes the grid notation more understandable, and makes it easier to update one value everywhere it is used.
The names of variables are arbitrary. Here I used $g to keep the code short but it could have been $gutter or anything else. Just be sure to reference the same name everywhere you use it.
# Create a variable to measure column width.
$c = | { ~ } | $g | ~ | $g | ~ | (vnl $WIDTH)
Here, we’re assigning a new variable called $c which will have two important jobs. First, it creates our column grid. Second, it provides us with the context to determine the size of our columns which we need later.
The | commands indicate where guides should go. The ~ is called a wildcard. GuideGuide will evenly distribute available space between all of the wildcards along an axis. Notice that there are three of them, with a $g in between.
The parts in parenthesis are options for the grid. You can ignore the letters, they aren’t important here. To the right is a place where we can put a unit of measurement that will force the grid to be a specific size.
Notice we’re using a variable in that place called $WIDTH, but we didn’t define it first. $WIDTH and $HEIGHT are special variables that are always available which refer to the width and height of area that GuideGuide will use as a reference when it creates your grid.
You might have missed it, but the first wildcard is wrapped in brackets. We’ll come back to that in the next step.
# Measure a row that is 9/16 of the width
$r = | 56.25% | (vnl $c[1])
We want an aspect ratio of 16:9. That means 9 ÷ 16 = .5625. GuideGuide works with percents, so we know our rows need to be 56.25% of our column width.
To calculate this, we create a new variable called $row. To that variable we add two guides, make the space between them 56.25%.
Back when we defined the $c variable, we wrapped one of the wildcards in brackets, something called a block. When a variable is assigned it keeps track of the commands in its blocks so we can reference them later.
GuideGuide processes relative commands (percents, wildcards, etc) as soon as it is able to. Because we provide a grid size to $g it calculated the size of its wildcards. That means if we reference our block, we won’t get back a wildcard, we get back a command that is the calculated size of a column. When we assign our $r variable, we tell it that its total size will be equal to the first block in the $c variable.
All of this effectively becomes “Create a variable called $row that has two guides that have space between them that is 56.25% of the width of one column”
Phew, that was painful.
# Create a variable for our rows
$rg = | $r | $g |
A requirement of our grid was to add as many rows as will fit. However, we also need a gutter between the rows. To do this, we create one more variable that has both a row and a gutter in it, with guides between them.
# Finally create our grid
$c (vnl)
This is fairly straight forward. Notice there’s no = after the variable, which means this is a reference. A reference say “put all of your commands here”. And because we’re not doing this inside another variable, these commands will be applied to the current document.
Notice the options in parenthesis — this time they matter, because we’re finally adding content. The v tells GuideGuide that the guides will be vertical. Ignore everything else.
$rg* (hnl)And now for our rows.
Same as above, this is a variable reference, this time to $rg. Notice the h in the options, which tells GuideGuide these are horizontal guides.
Finally, there is a * after the variable, which is a command that tells it how many times to repeat the command. In this case, we didn’t tell it how many times, so GuideGuide will just repeat it until it runs out of space.
And with that, we’ve completed the grid. I’d say I hope you enjoyed this, but let’s be realistic, this was probably all a bit much. But hey, now you know that you can do some really crazy stuff if you need to.